The History of Photography
Camera Obscura
|
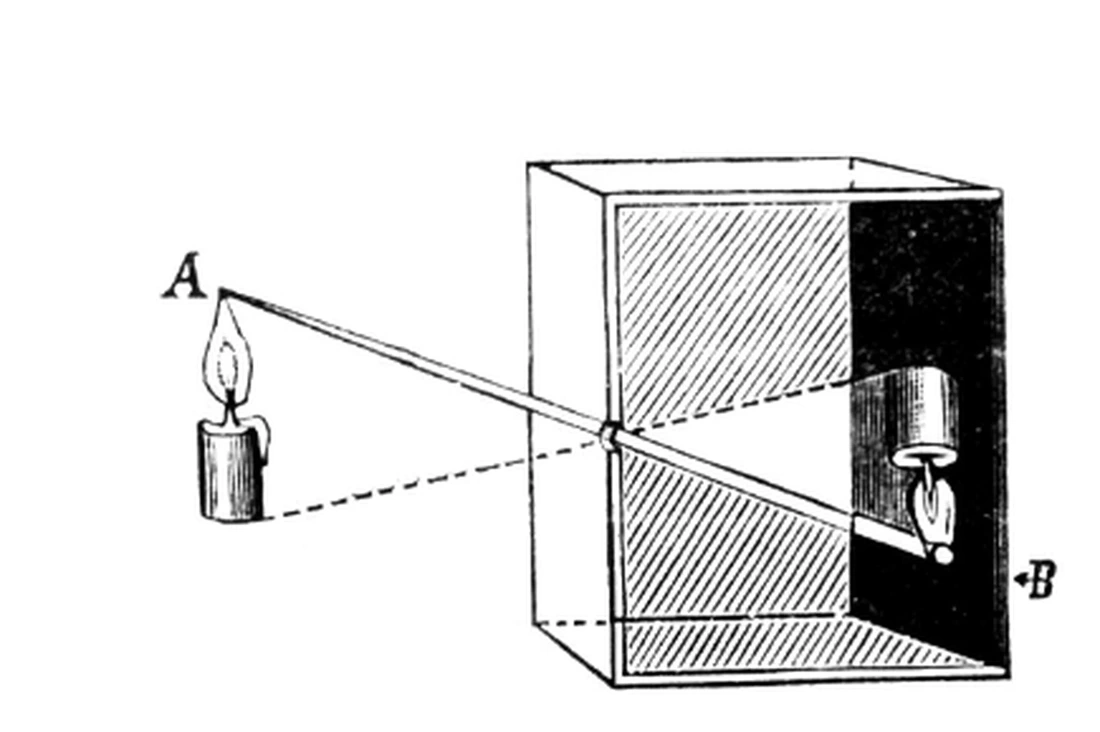
Camera obscura, predecessor of the photographic camera. In Latin camera obscura translates to “dark chamber,” with the earliest versions dating all the way back to before the middle ages. They consisted of small darkened rooms with light entering through a single minute hole. The result was that an inverted image of what was outside projected on the opposite wall, which was usually whitened. For hundreds of years this technique was used for viewing solar eclipses without endangering the eyes and then in the 16th century as an aid for artists. The subject was placed outside and the image reflected on a piece of drawing paper for the artist to trace. Eventually smaller versions were built some even being pocket sized.
|
|


First i made a cube with black paper with 2 open faces. I then covered one face with tracing paper and the other black paper with a square cut out. I then placed a lens on the front and measured the focal length Which was 2cm. After i made a black paper tube with the lens attached to the front cut it to the right length and then taped it to the front making a complete camera obscura. The image that appeared was a bit soft but overall well enough focused. The next step was to draw what i could see which proved difficult as the camera obscura wasn't rigid. It would've gone better if i had made the main body more rigid but overall it worked as I could see reasonably clear image of what was outside
Inro to DSLR
|
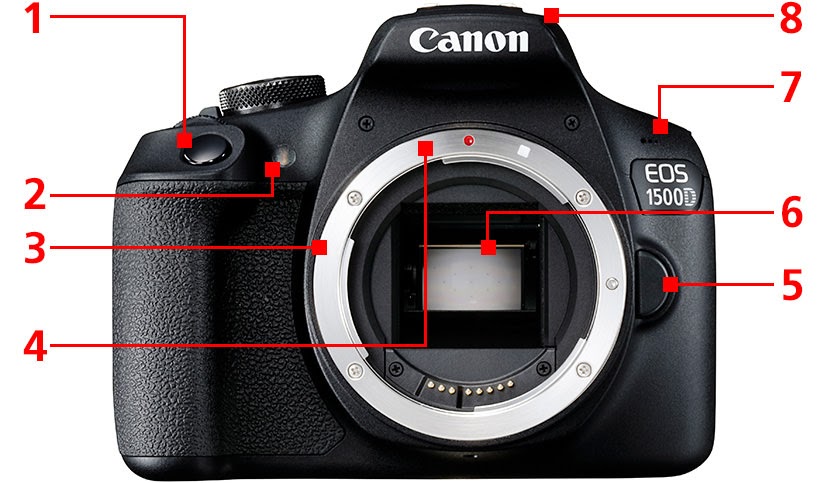
1. Shutter release
2. Self-timer lap 3. Lens mount 4. Lens mount index 5. Lens release 6. Mirror 7. Microphone |
|
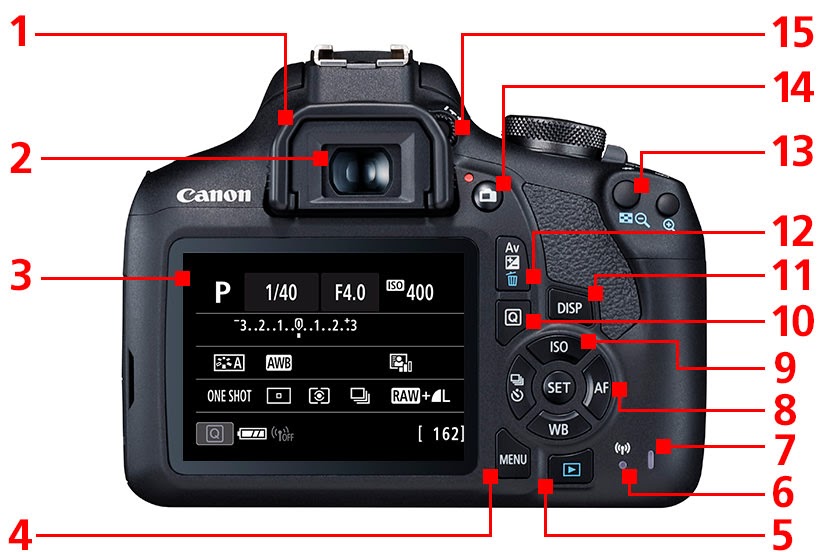
1. Eyecup
2. Viewfinder eyepiece 3. Lcd monitor 4. Menu button 5. Playback button 6. Wifi lamp 7. Access lamp 8. SET button/Multi-controller 9. ISO speed setting button 10. Quick control button 11. Display button 12. Erase button 13. Focus point selection button 14.Live view shooting/Movie shooting switch 15. Dioptric adjustment knob |
|
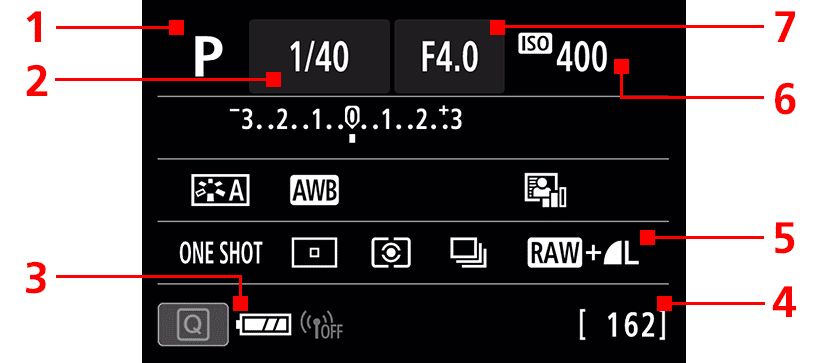
1. Shooting mode
2. Shutter speed 3. Battery level 4. Shots remaining 5. Image recording format/Quality |

|
1. Focus mode switch
2. Speaker 3. Strap mount 4. Hot shoe 5. Power switch 6. Mode dial 7. Flash button 8. Main dial 9. Zoom ring 10. Focus ring |
Complete the task- check the google classroom for the final image and the link to the website that will help you add the labels.
Photos with a DSLR
What settings did you have your camera on?
ISO: Sensitivity 400
Program Mode: TV / Shutter Speed Priority
Shutter Speed: 1/60th of a second
What theme were you asked to respond to?
Natural vs Manmade
Do you feel that you photographed appropriate images? Did you find anything difficult eg composition or exposure?
ISO: Sensitivity 400
Program Mode: TV / Shutter Speed Priority
Shutter Speed: 1/60th of a second
What theme were you asked to respond to?
Natural vs Manmade
Do you feel that you photographed appropriate images? Did you find anything difficult eg composition or exposure?
Shutter Speed

ISO: 400
Shutter Speed: 1/200 Aperture: F/5.6 |

ISO: 400
Shutter Speed: 1/60 Aperture: F/10.0 |

ISO: 400
Shutter Speed: 1/10 Aperture: F/22.0 |
Shutter speed is the speed at which the shutter will stay open for. If you have a shutter speed of 1 second the camera will take in light for one second but if its longer than 1/60 you will need a tripod as you wont be able to keep it still. high shutter speeds are used for slow phenomenon like the northern lights. Whereas high shutter speeds would be used for capturing images of moving object like a bee flapping its wings.
Did you have more photos than this? We did it twice...?
Did you have more photos than this? We did it twice...?
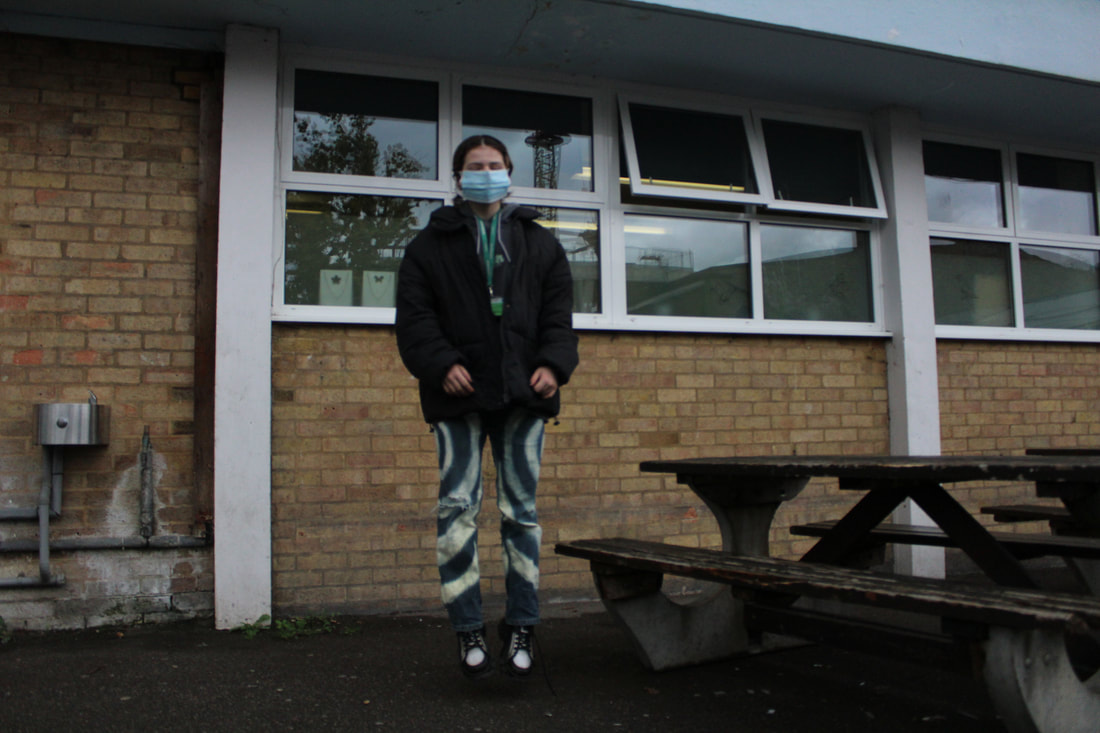
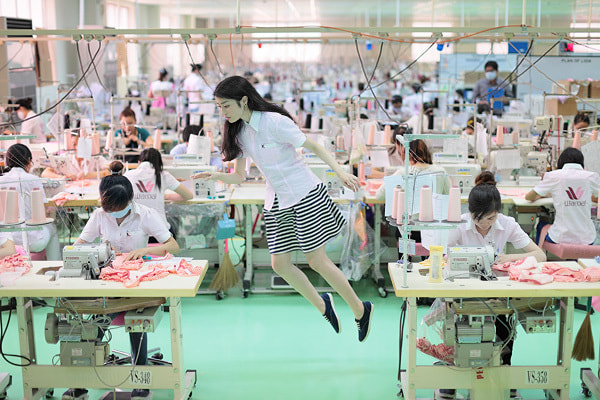
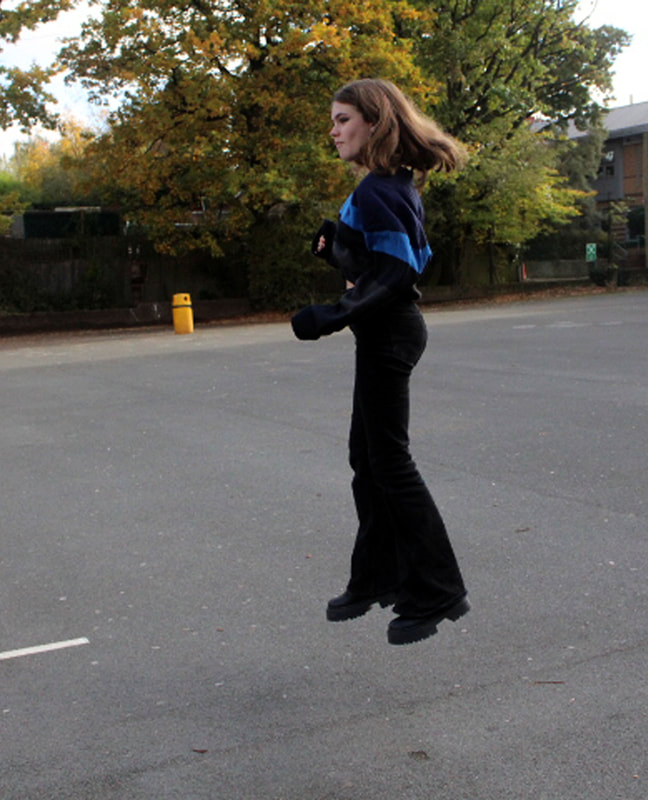
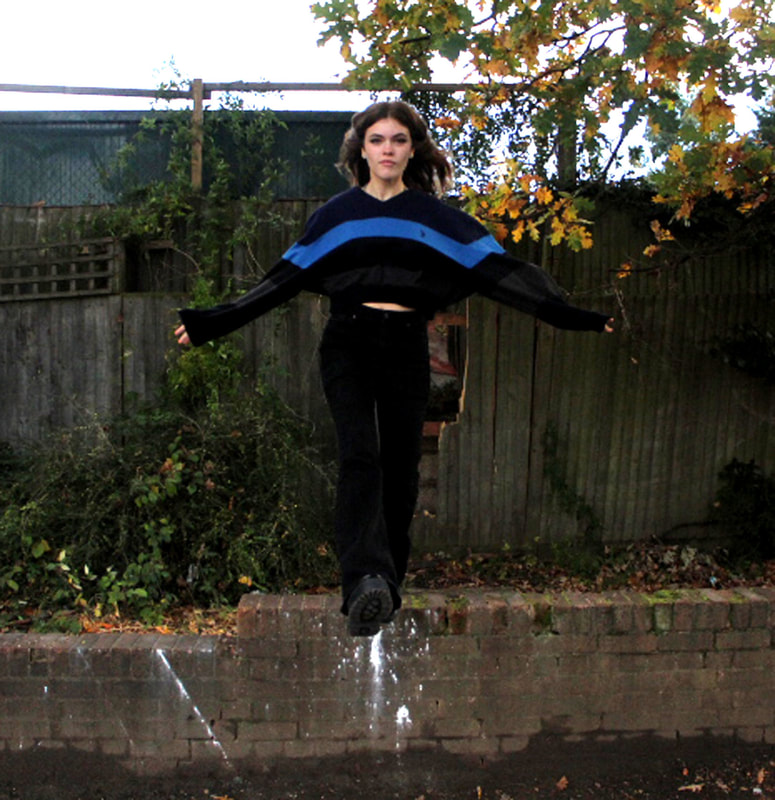
Levitation
Introduce the task
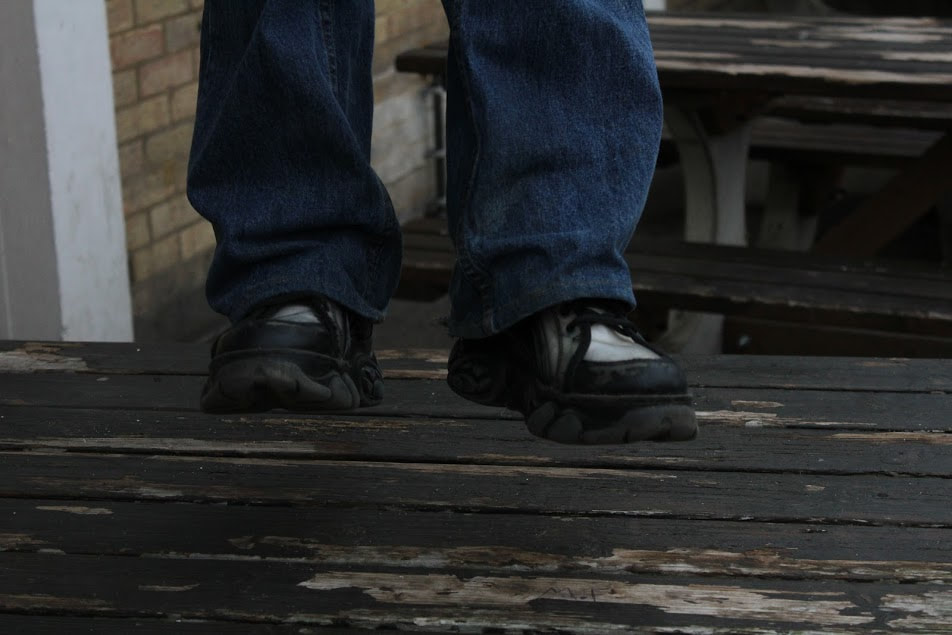
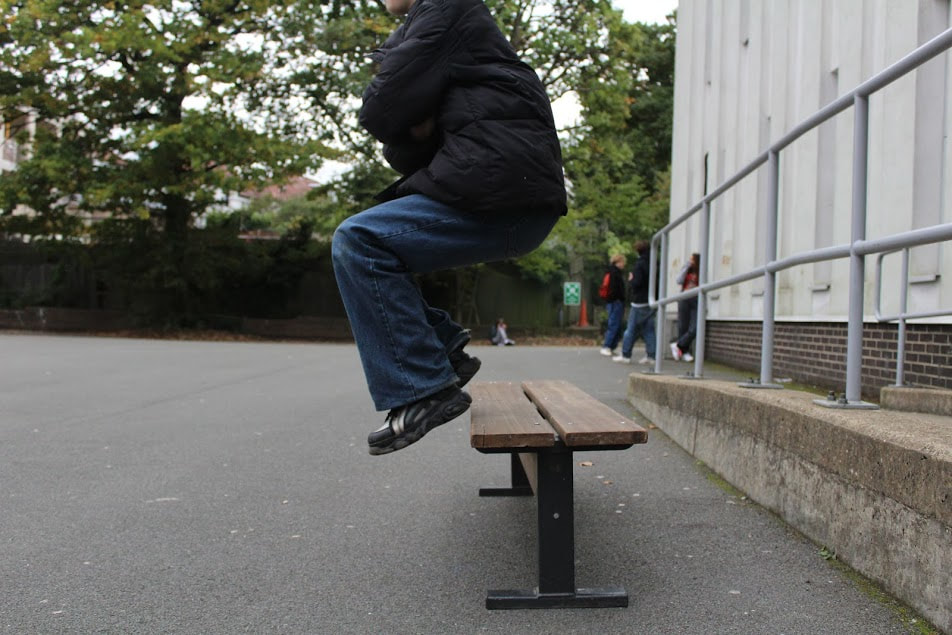
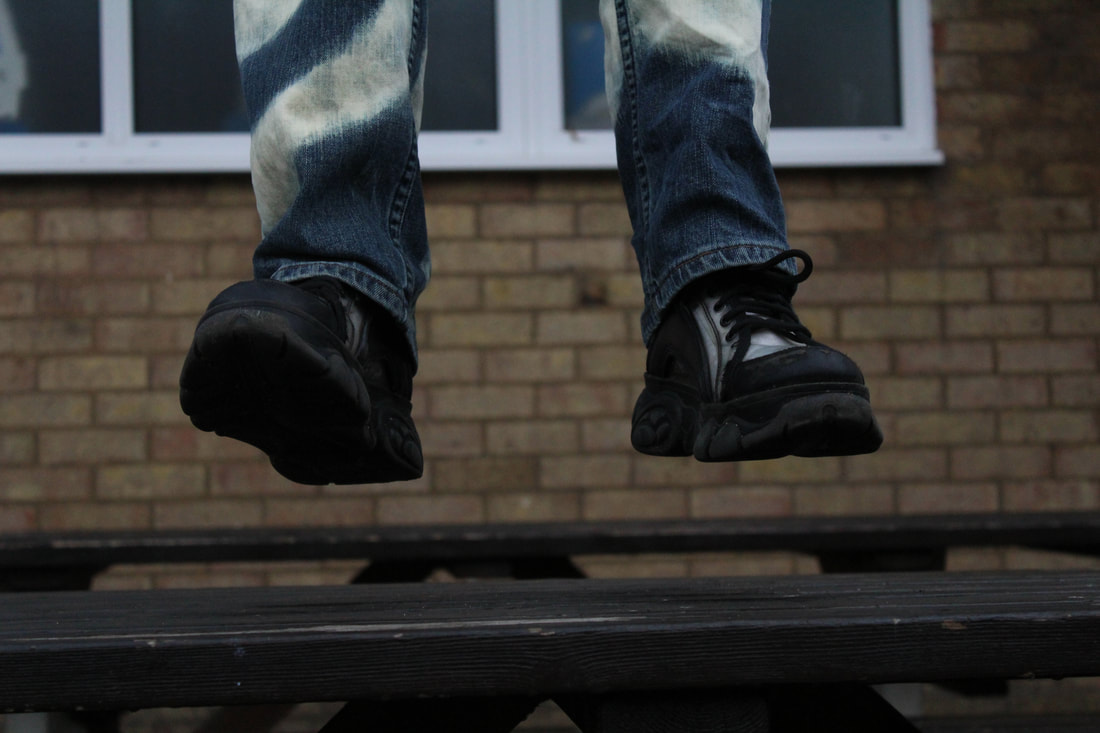
In this task we were trying to make it appear like we were floating by taking photos with a high shutter speed and jumping.
In this task we were trying to make it appear like we were floating by taking photos with a high shutter speed and jumping.
ISO: 400
Shutter Speed: 1/4000 Aperture: F/5.6 |
ISO: 800
Shutter Speed: 1/4000 |
ISO: 1600
Shutter Speed: 1/4000 Aperture: F/5.6 |
ISO: 800
Shutter Speed: 1/4000 Aperture: F/5.6 |
Yowa Yowa
|

|
Photoshop
Make sure that you show the before and after editing.
|
|
ISO: 1600
Shutter Speed: 1/4000s
Shutter Speed: 1/4000s
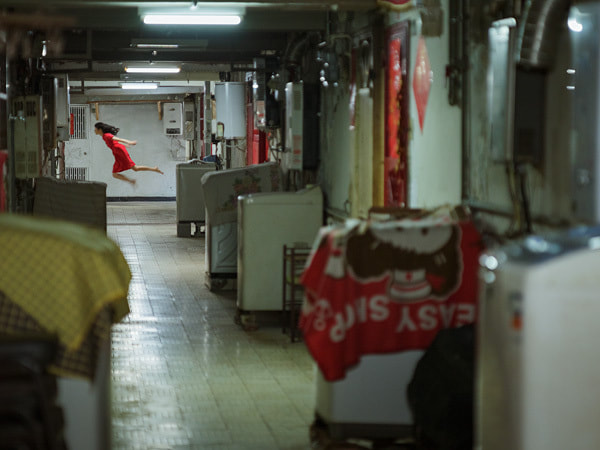
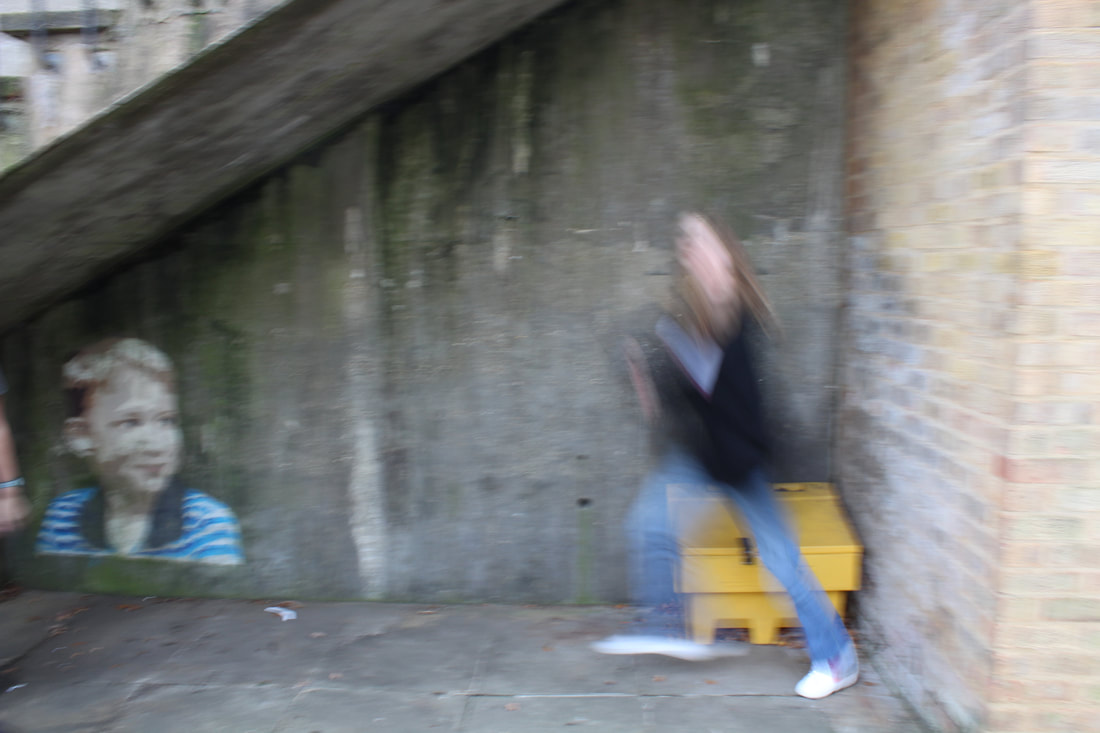
Francesca Woodman
We took photos in the style of Francesca Woodman by using a slow shutter speed and taking them in broken down areas. We then photoshopped them make them more like Francesca Woodman's photos
Create a slide show of about 10 of your first attempts- they do not all have to be successful as long as you explain how you improved your technique as the task went on.
Create a slide show of about 10 of your first attempts- they do not all have to be successful as long as you explain how you improved your technique as the task went on.
Before
|
|
Editing Process
After
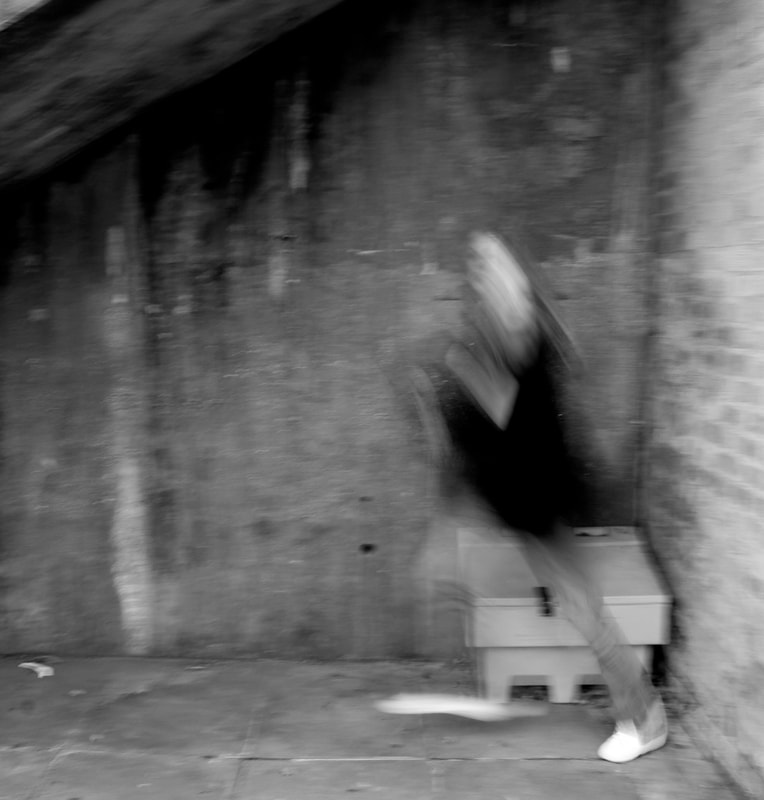
ISO: 200
Aperture: F/ 13.0 Shutter Speed: 1/6 |
ISO: 400
Aperture: F/ 29.0 Shutter Speed: 1/4 |
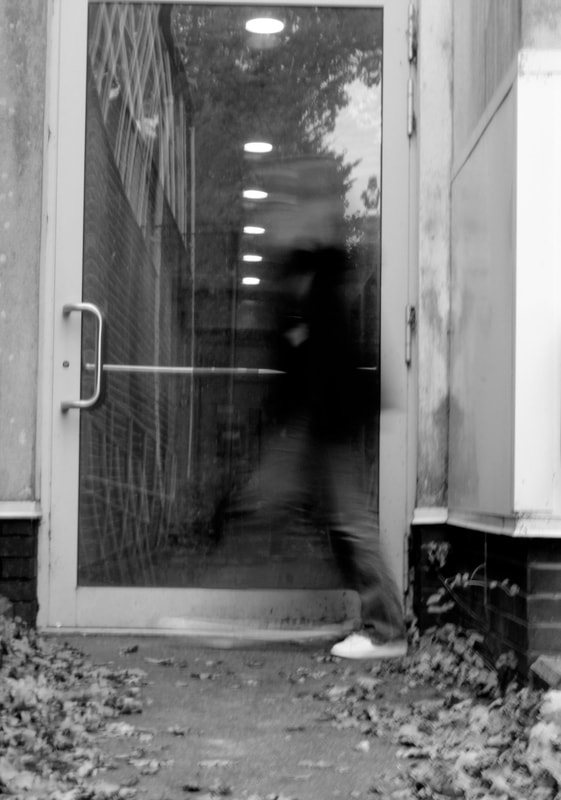
WWW: We had good lighting and good timing on the photos so the figures looks ghostly.
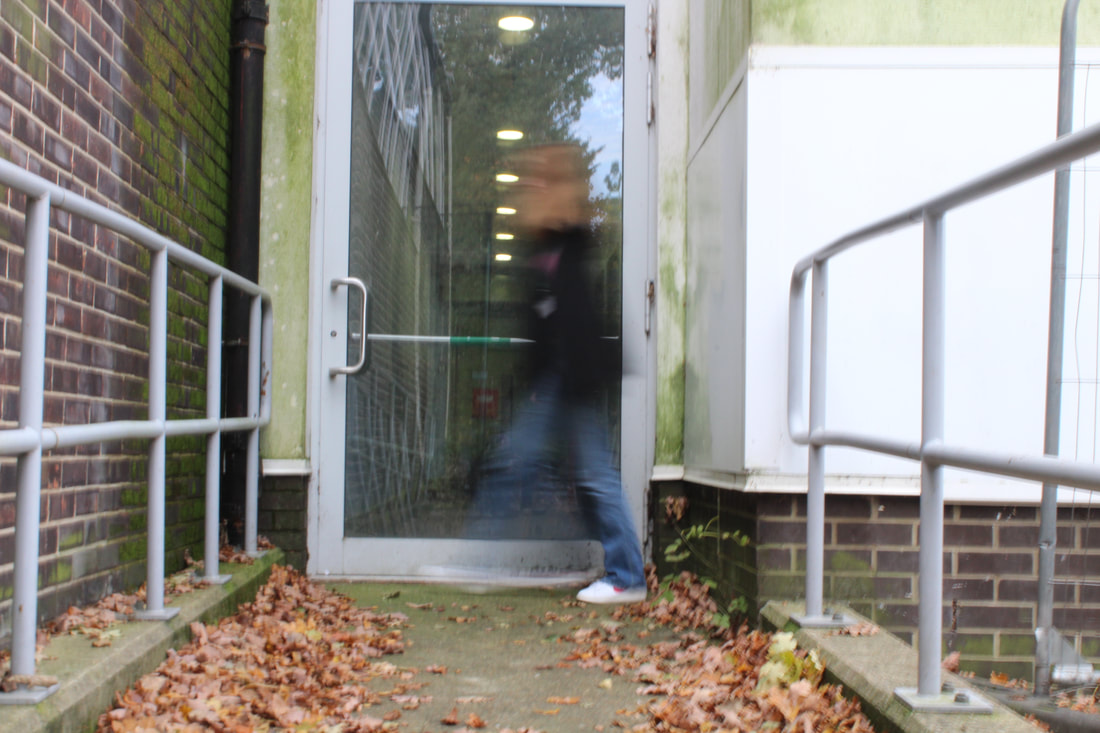
EBI: We hadn't taken photos infront of a modern glass fire door.
EBI: We hadn't taken photos infront of a modern glass fire door.
Francesca Woodman Analysis
Give a brief overview of Woodman’s life
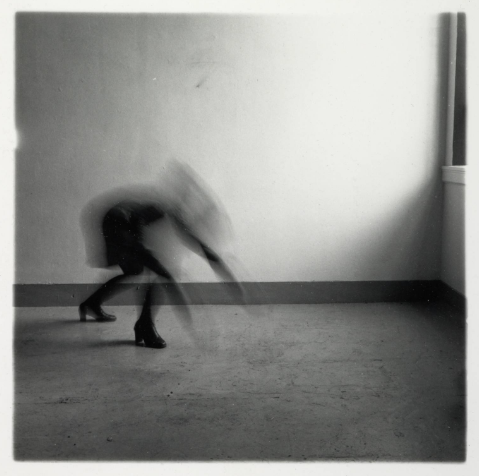
Describe the image, Providence, Rhode Island (1975-78)
Describe the image, Providence, Rhode Island (1975-78)
francesca woodman was an American photographer in the late 70s who spend a large amount of timeexperienting the the abnormal and images that were were unsettling.
|
IntentionsIn the photo "Providence, Rhode Island" I think Francesca Woodman's intentions were to make people properly look at them rather than glancing and walking away. She did this by obscuring herself making only her shoes easily visible and the rest of her almost ghost-like I think she wanted people to react by inspecting her photos to figure out what was where.
Wider contextIn this work I think woodman is addressing how women are usually sexualised in media. This is shown by the fact you can't even see her face in the picture. I think she wanted to explore what she could achieve without conforming to the general media.
|
Style and process
Woodman used long exposure to create this work. This help her create the effect of her being blurred out of the photo as she has more time to move. This helps support her intentions of going against the norm by making her self barely even visible in her photos.
Whilst there are some interesting images here, you haven't included many of the points we discovered during the lesson.
Aperture
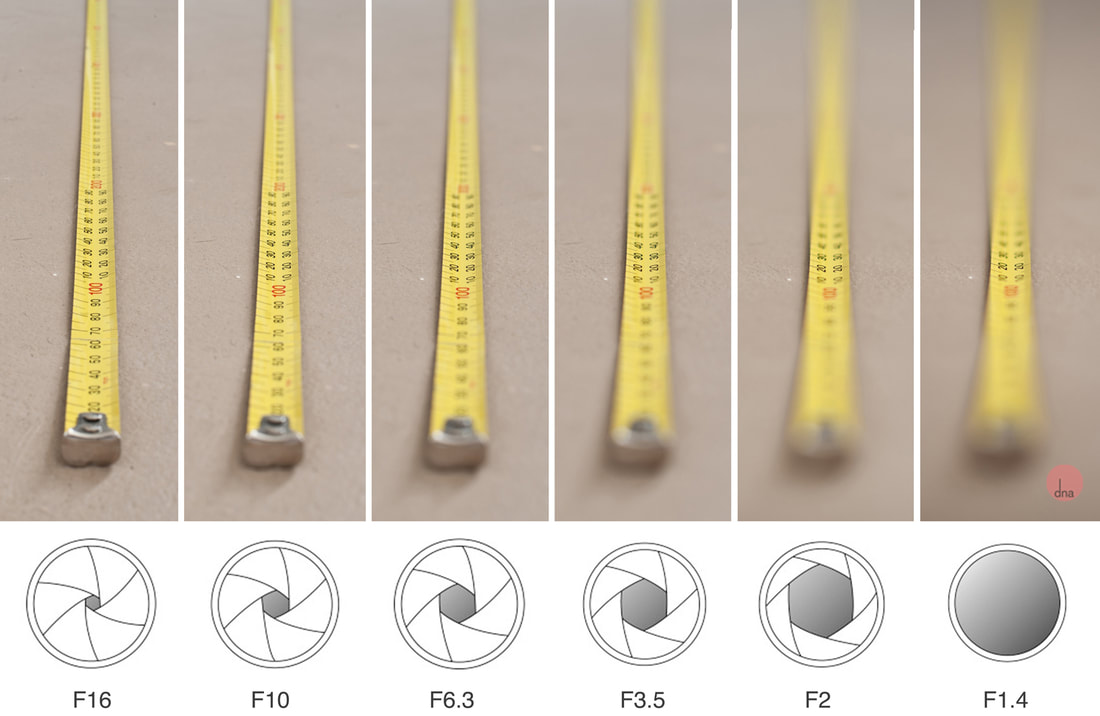
In this task we experimented with aperture which alters the depth of field which controls the size of the area in focus. Explain Depth of field- find an example on the internet that shows the difference.
Example of Depth of Field
This was my first attempt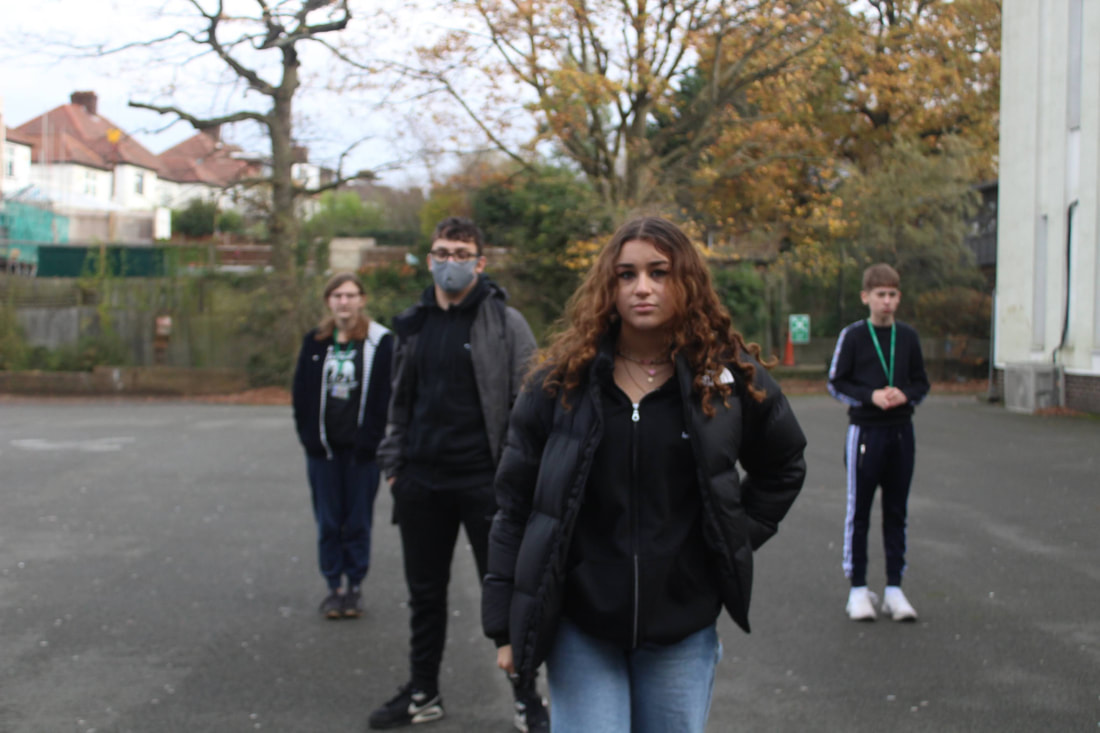
ISO: 400
Aperture: F/4.5 Shutter Speed: 1/800 
ISO: 400
Aperture: F/14.0 Shutter Speed: 1/60 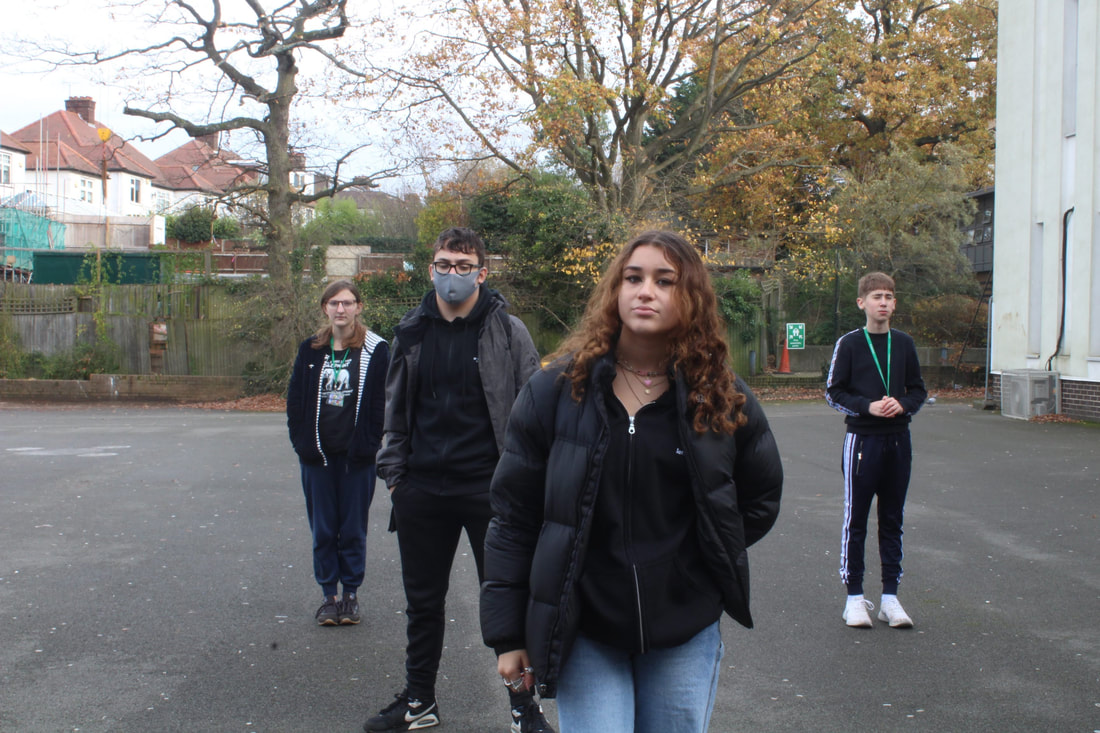
ISO: 400
Aperture: F/29.0 Shutter Speed: 1/ 20 |
This was my second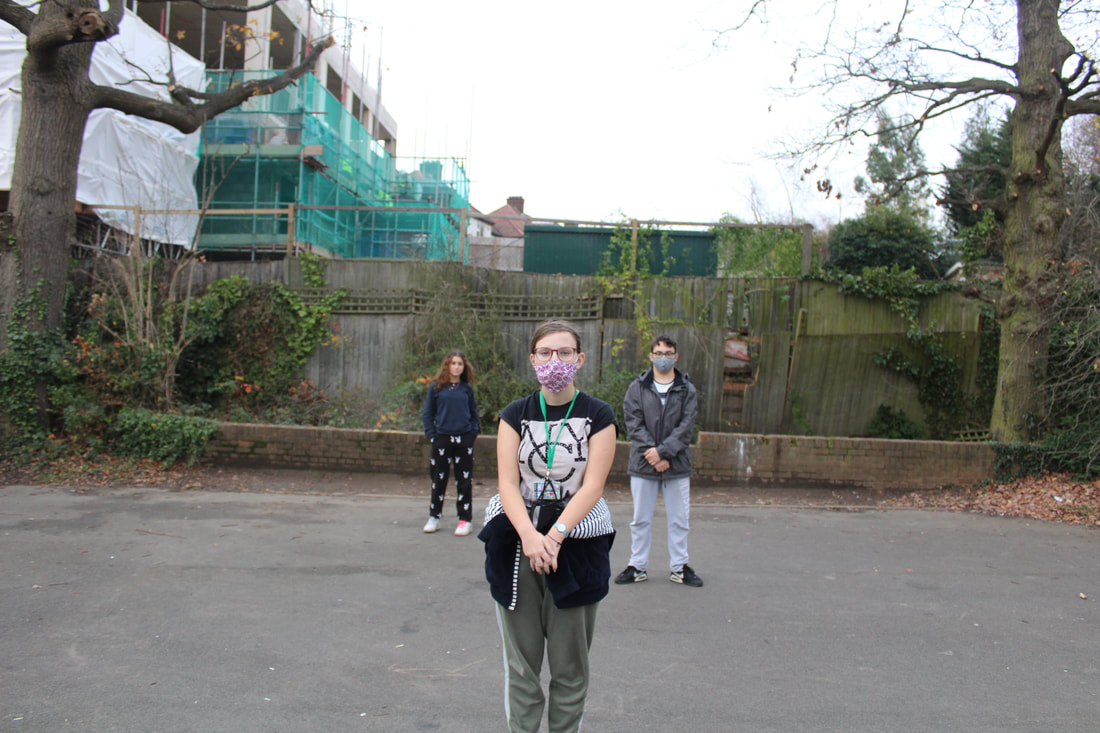
ISO: 400
Aperture: F/3.5 Shutter Speed: 1/250 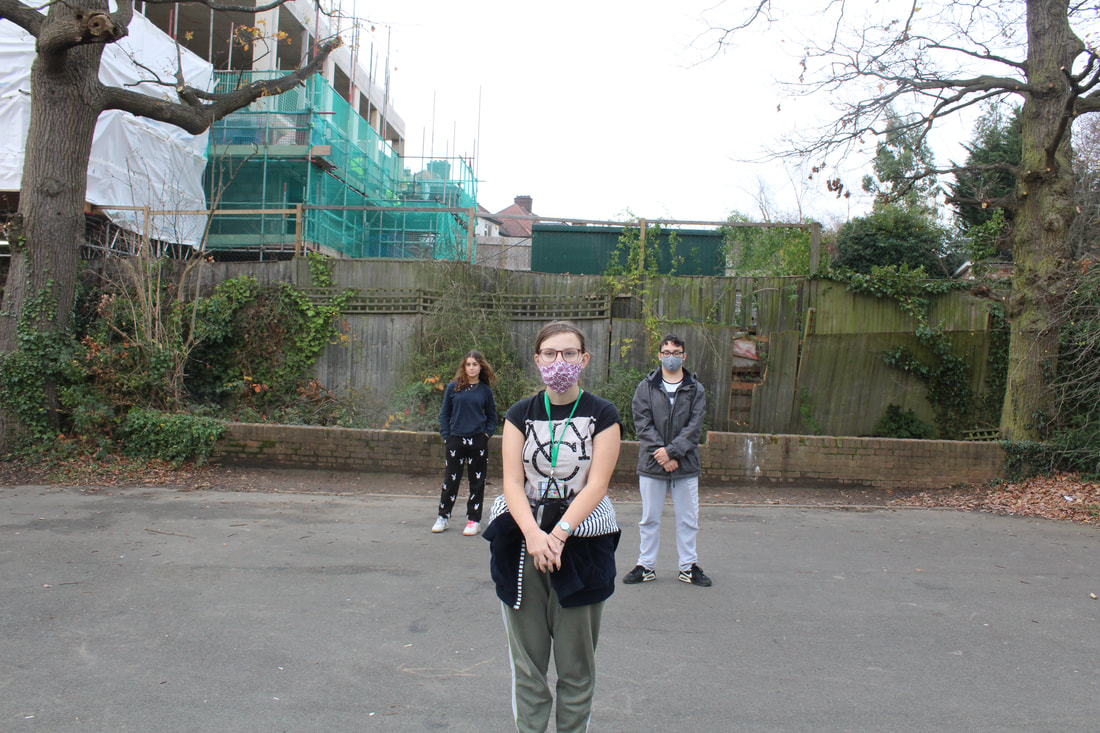
ISO: 400
Aperture: F/11.0 Shutter Speed: 1/25 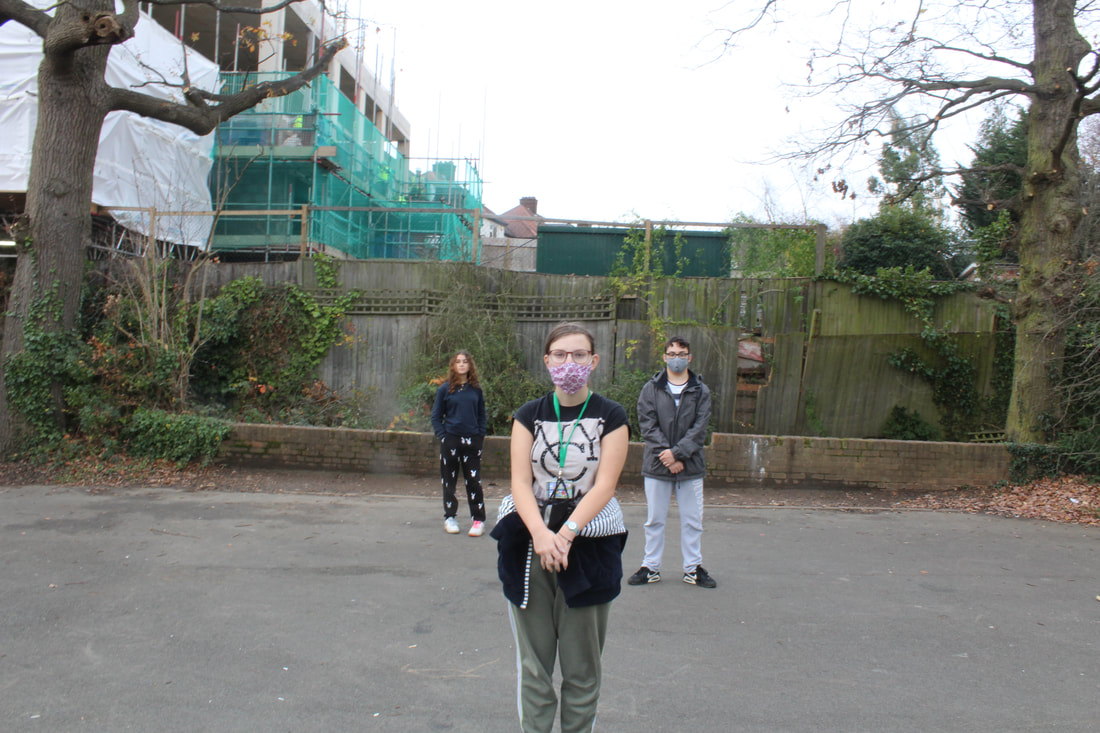
ISO: 400
Aperture: F/22.0 Shutter Speed: 1/6 |
And this was my best set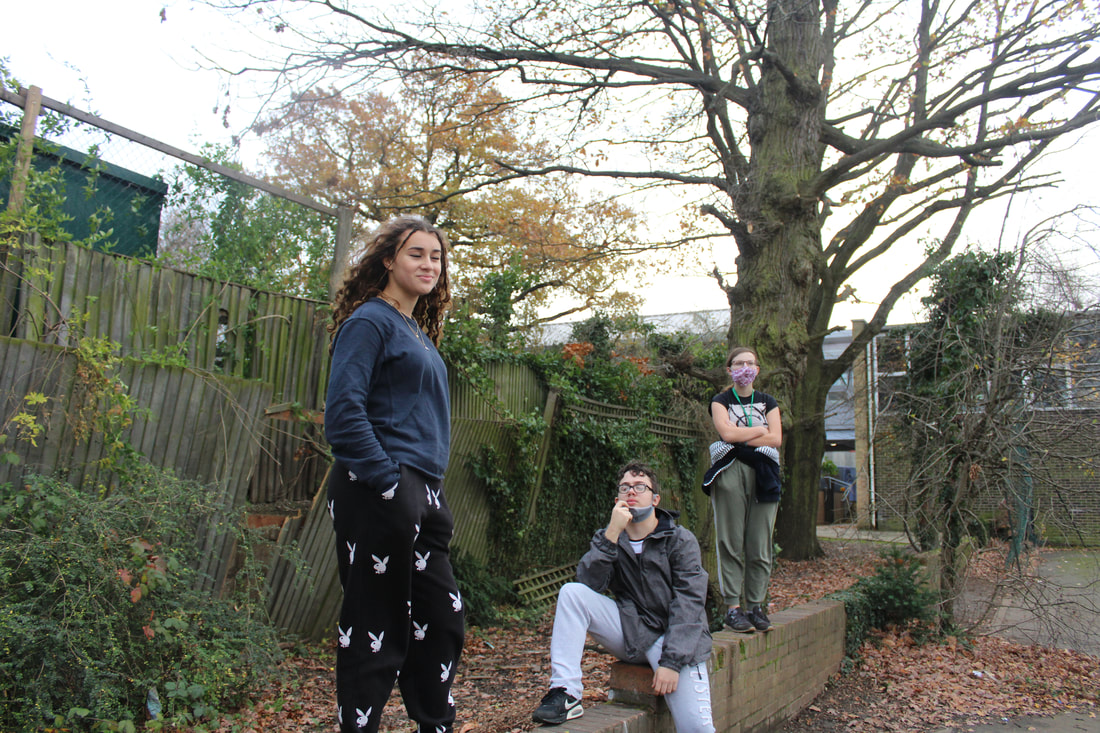
ISO: 400
Aperture: F/3.5 Shutter Speed: 1/500 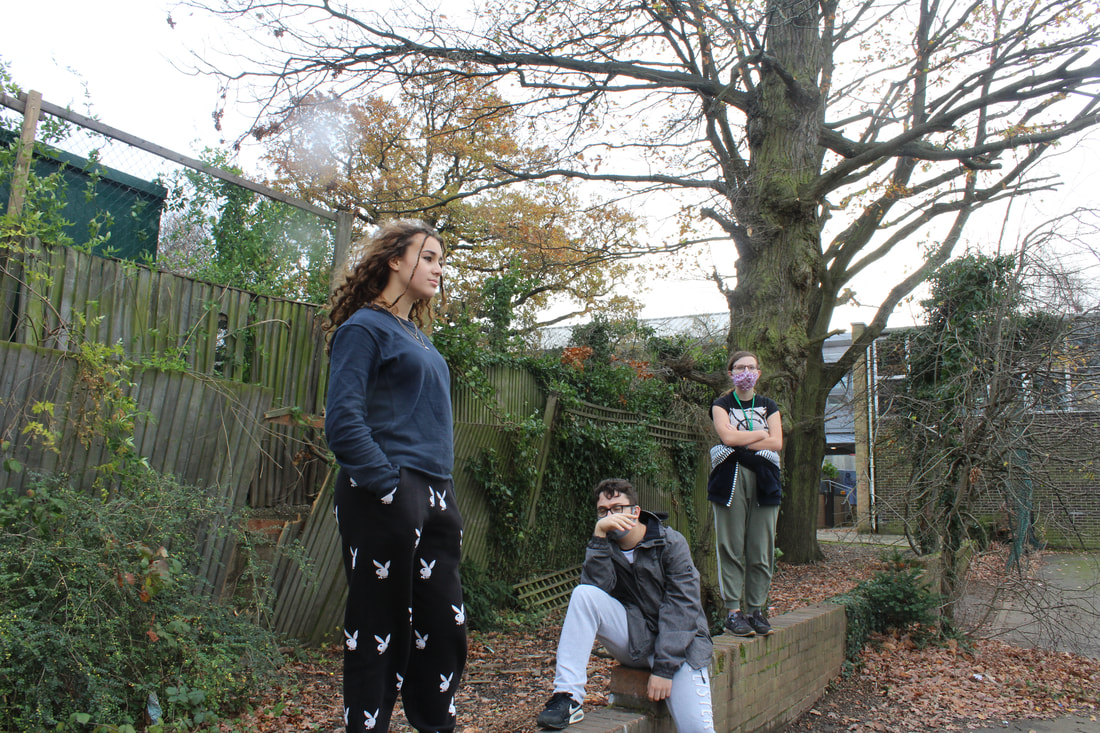
ISO: 400
Aperture: F/13.0 Shutter Speed: 1/40
ISO: 400
Aperture: F/22.0 Shutter Speed: 1/13 |
I chose to use theswAnnotate: www and ebi, were you able to capture the difference in DoF, was your composition successful?
WWW: I got everyone in the photo
EBI: I had put more space in between each person as this would've helped better show the point of the task
WWW: I got everyone in the photo
EBI: I had put more space in between each person as this would've helped better show the point of the task
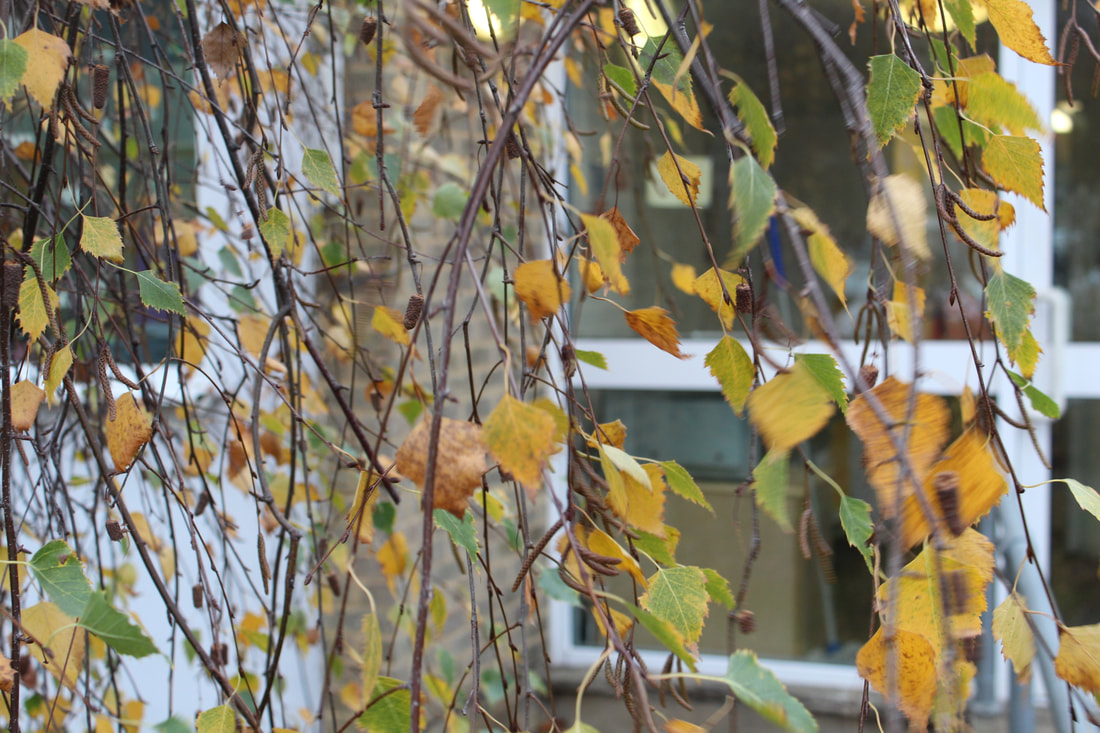
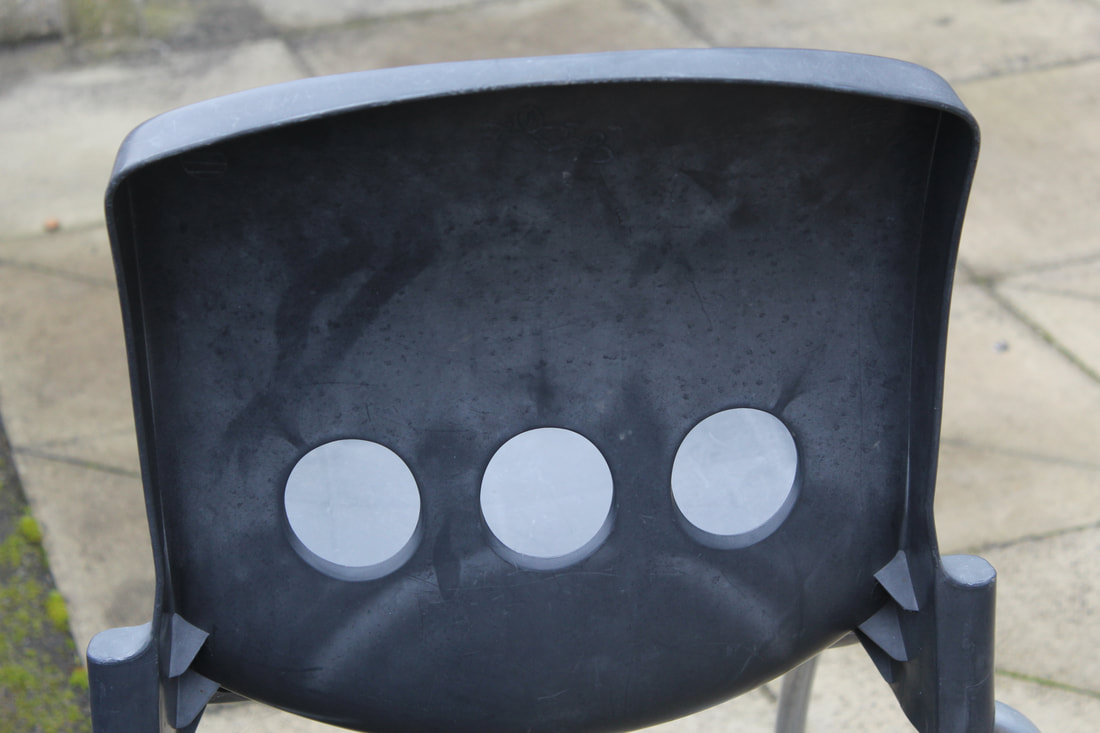
Composition
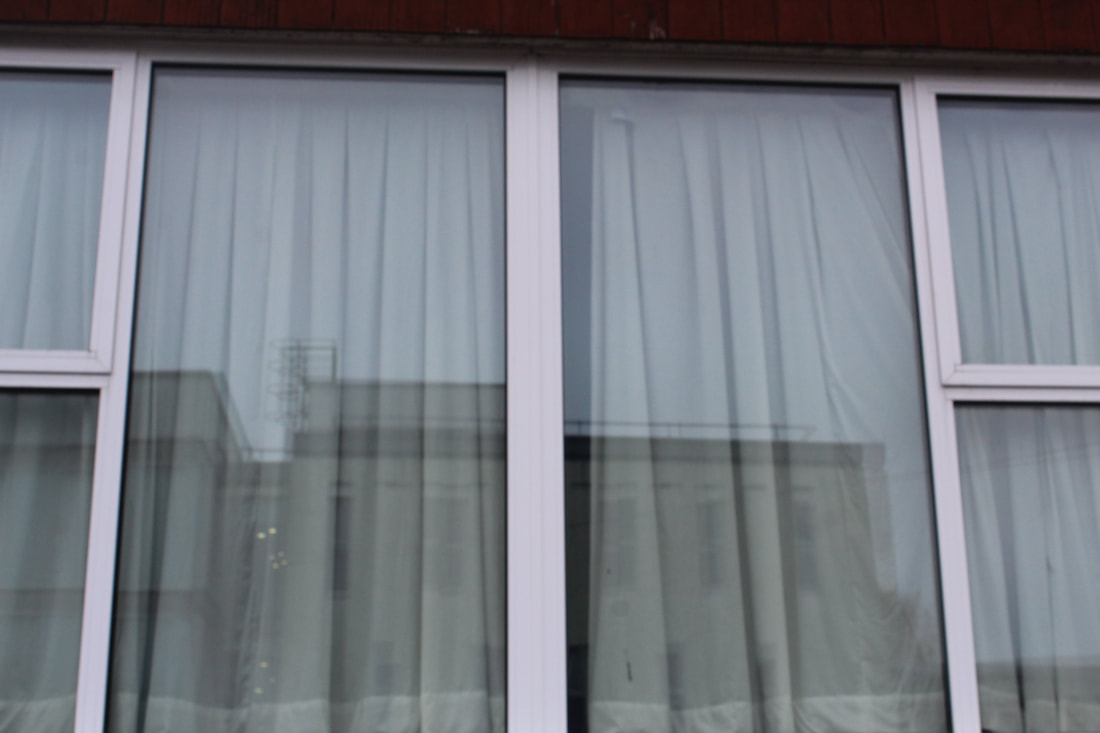
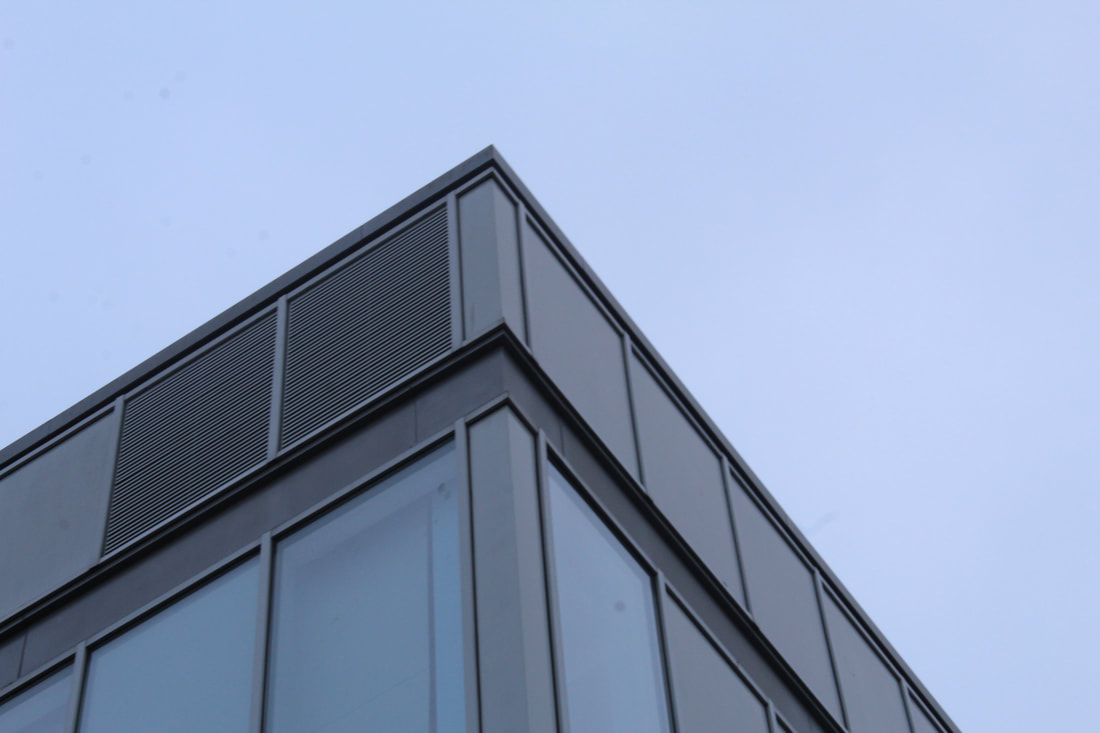
In this task we were seeing if we could make a composition on patterns and shapes.
3. Sub-heading: Composition exercise 1
4. Upload your unedited images as a slideshow. Ideally you would group the images.
5. Explain how you chose your compositions. where did you find the best examples of the images in the handout?
6. Follow the instructions in the attachment to edit your best nine images.
7. Present the handout next to your nine images on weebly.
8. Annotate: discuss how well you composed your images and controlled the camera (focus, zoom, exposure). Give at least one...WWW & EBI
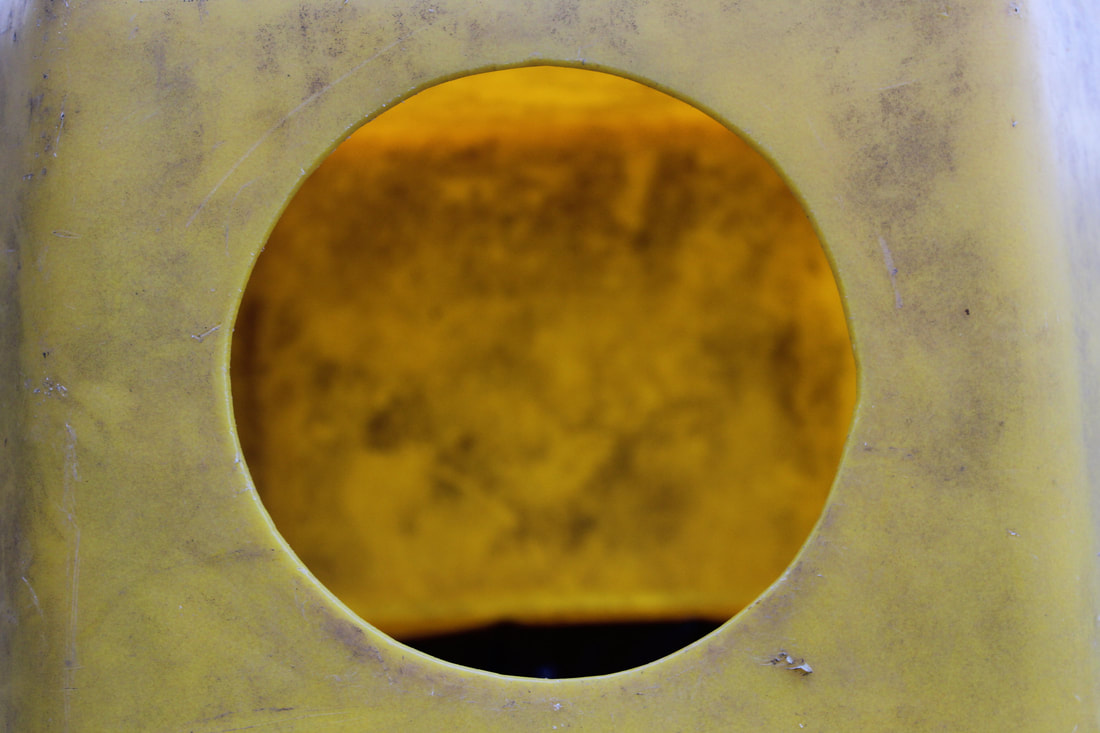
Composition exercise 1
ISO: 400
Aperture: F/10.0 Shutter Speed: 1/60 |

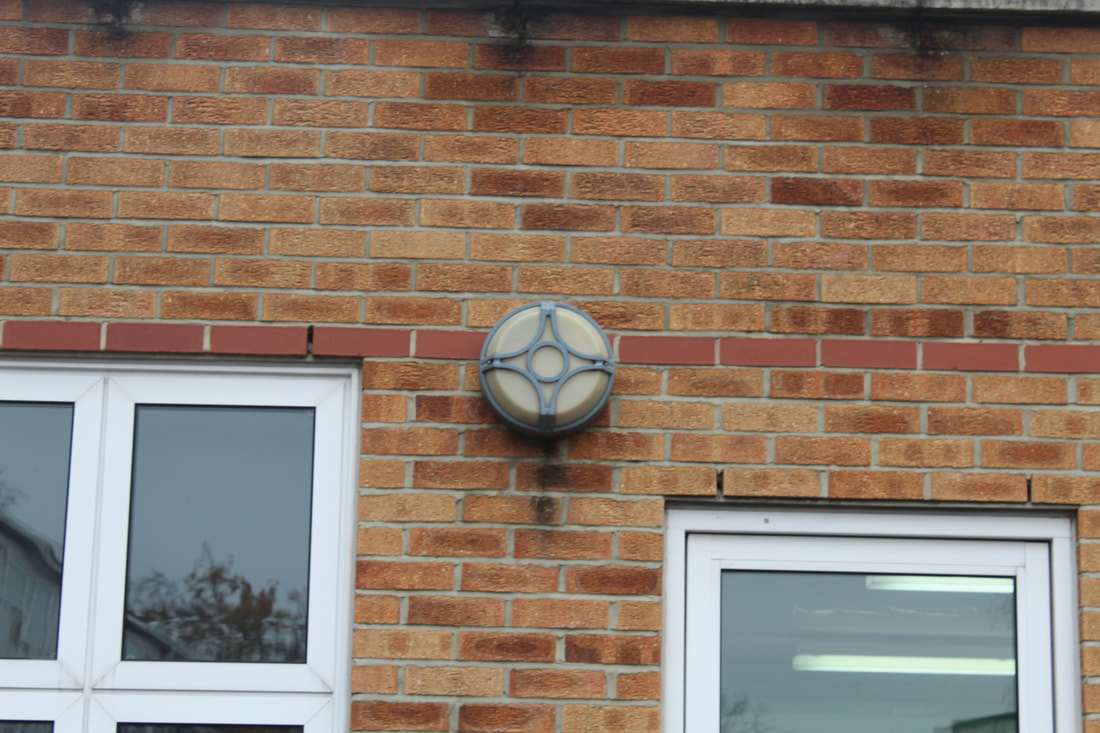
ISO: 400
Aperture: F/5.6 Shutter Speed: 1/60 |
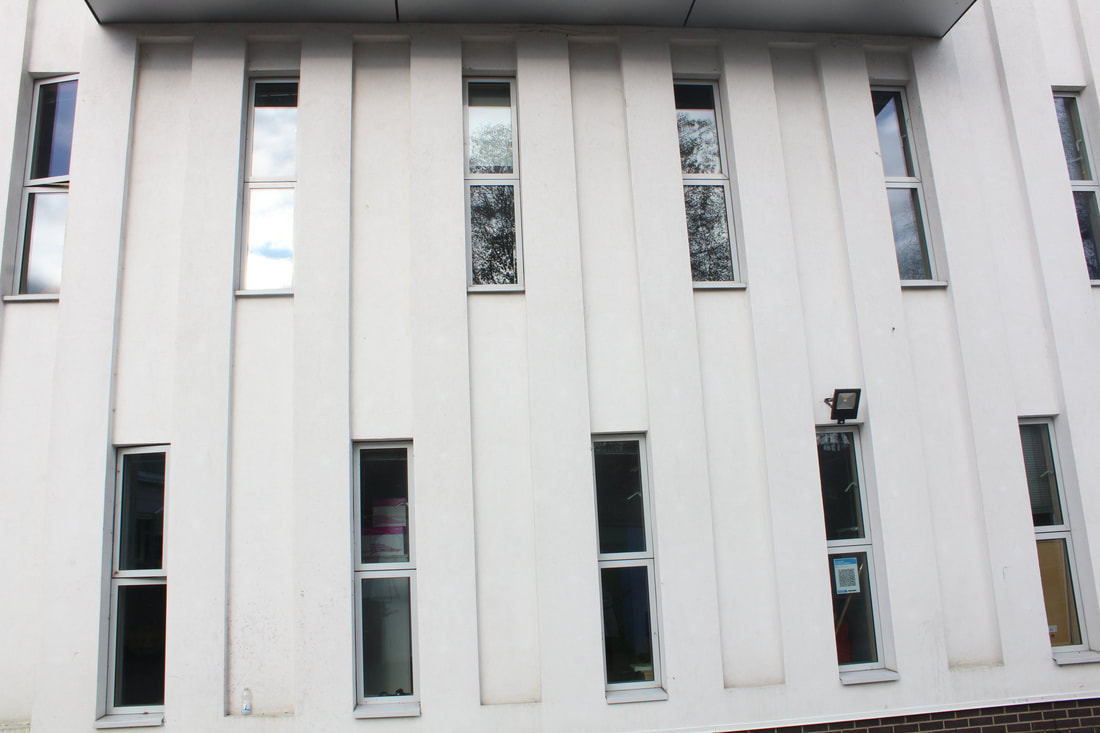
ISO: 400
Aperture: F/14.0 Shutter Speed: 1/60 |
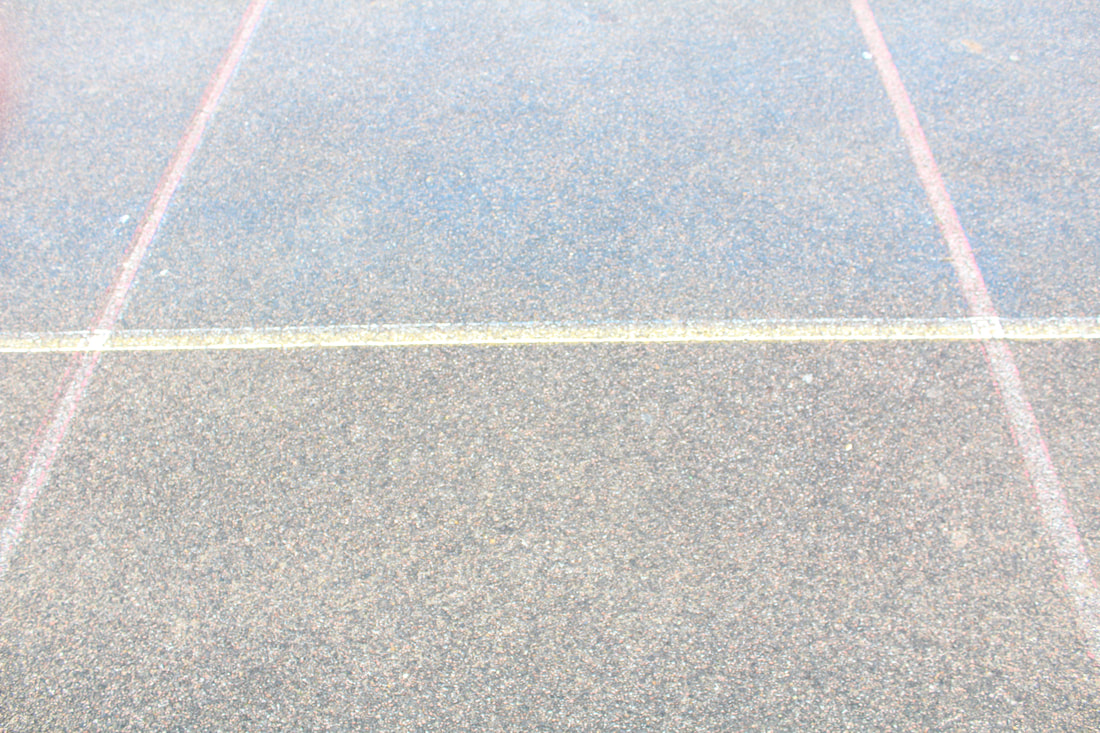
ISO: 400
Aperture: F/5.0 Shutter Speed: 1/60 |
ISO: 400
Aperture: F/9.0 Shutter Speed: 1/60 |
ISO: 400
Aperture: F/14.0 Shutter Speed: 1/125 |
ISO: 400
Aperture: F/5.6 Shutter Speed: 1/125 |
ISO: 400
Aperture: F/5.6 Shutter Speed: 1/60 |
ISO: 400
Aperture: F/5.6 Shutter Speed: 1/60 |
I chose to use these images because whilst they did show what i needed for my composition some of them were abstract as i had to edit them to make them look how i wanted. But i thought they would be original which was one of my main goals.
Composition exercise 2

|

|
WWW: I found some good shapes out in the school which fit the task
EBI: I had edited the images better and not gone so over-board on the saturation and just found more naturally colourful photos
EBI: I had edited the images better and not gone so over-board on the saturation and just found more naturally colourful photos
GIF
Attempt 1